Showing posts with label Battles. Show all posts

Thursday, November 2, 2023

The Price of Overconfidence - St. Ulrich - Part 2

 Phase 2:  "That fateful charge" and the Infantry Firefight

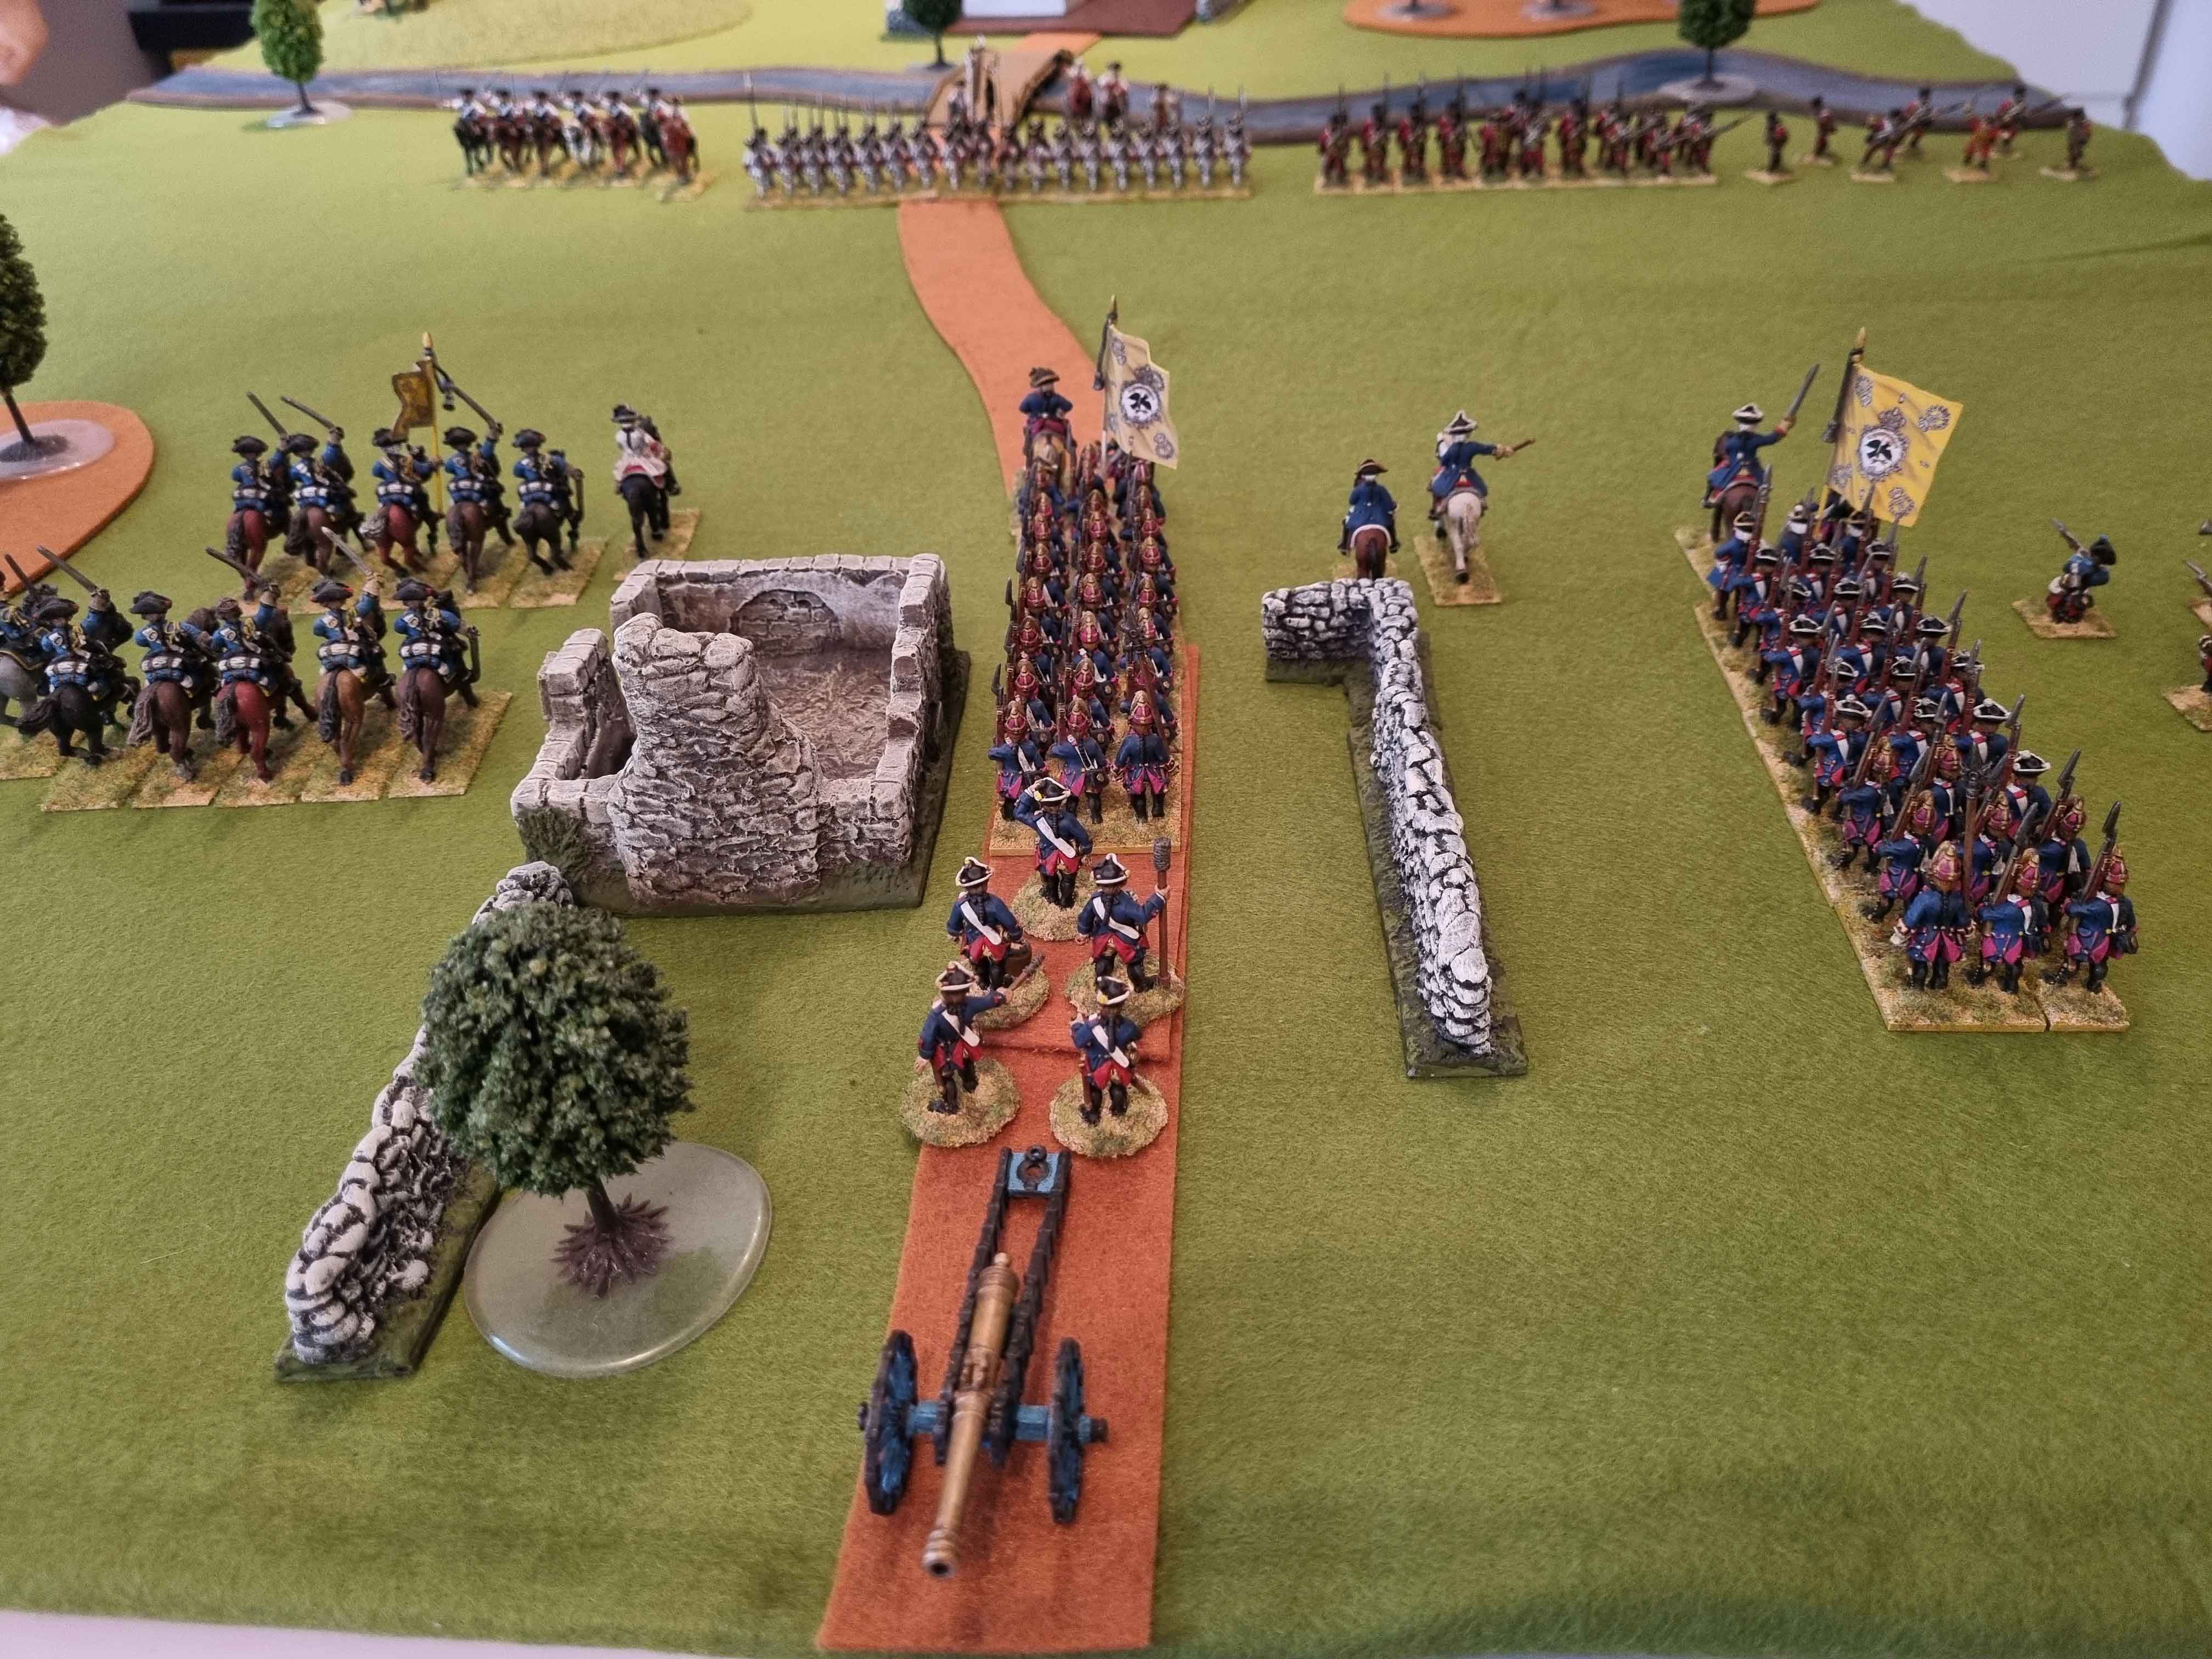
The CiC of the attacking force (to the left in the following photo) has observed the limbering up and movement of the enemy gun section on the hill (top right of photo). He deliberately kept his cavalry out of range of those guns. Now is the right time to charge before the gun section has repositioned [click pictures to enlarge]:

The cavalry charge is lauched (top left)


Below, the first Rodenburg squadron clashes with the Reichsbund cuirassiers. But what is the second squadron doing? Instead of backing up the first squadron and ensure, that the melee is won, they gallop right past, aiming for the bridge:

1st squadron in melee, 2nd squadron aims for the bridge


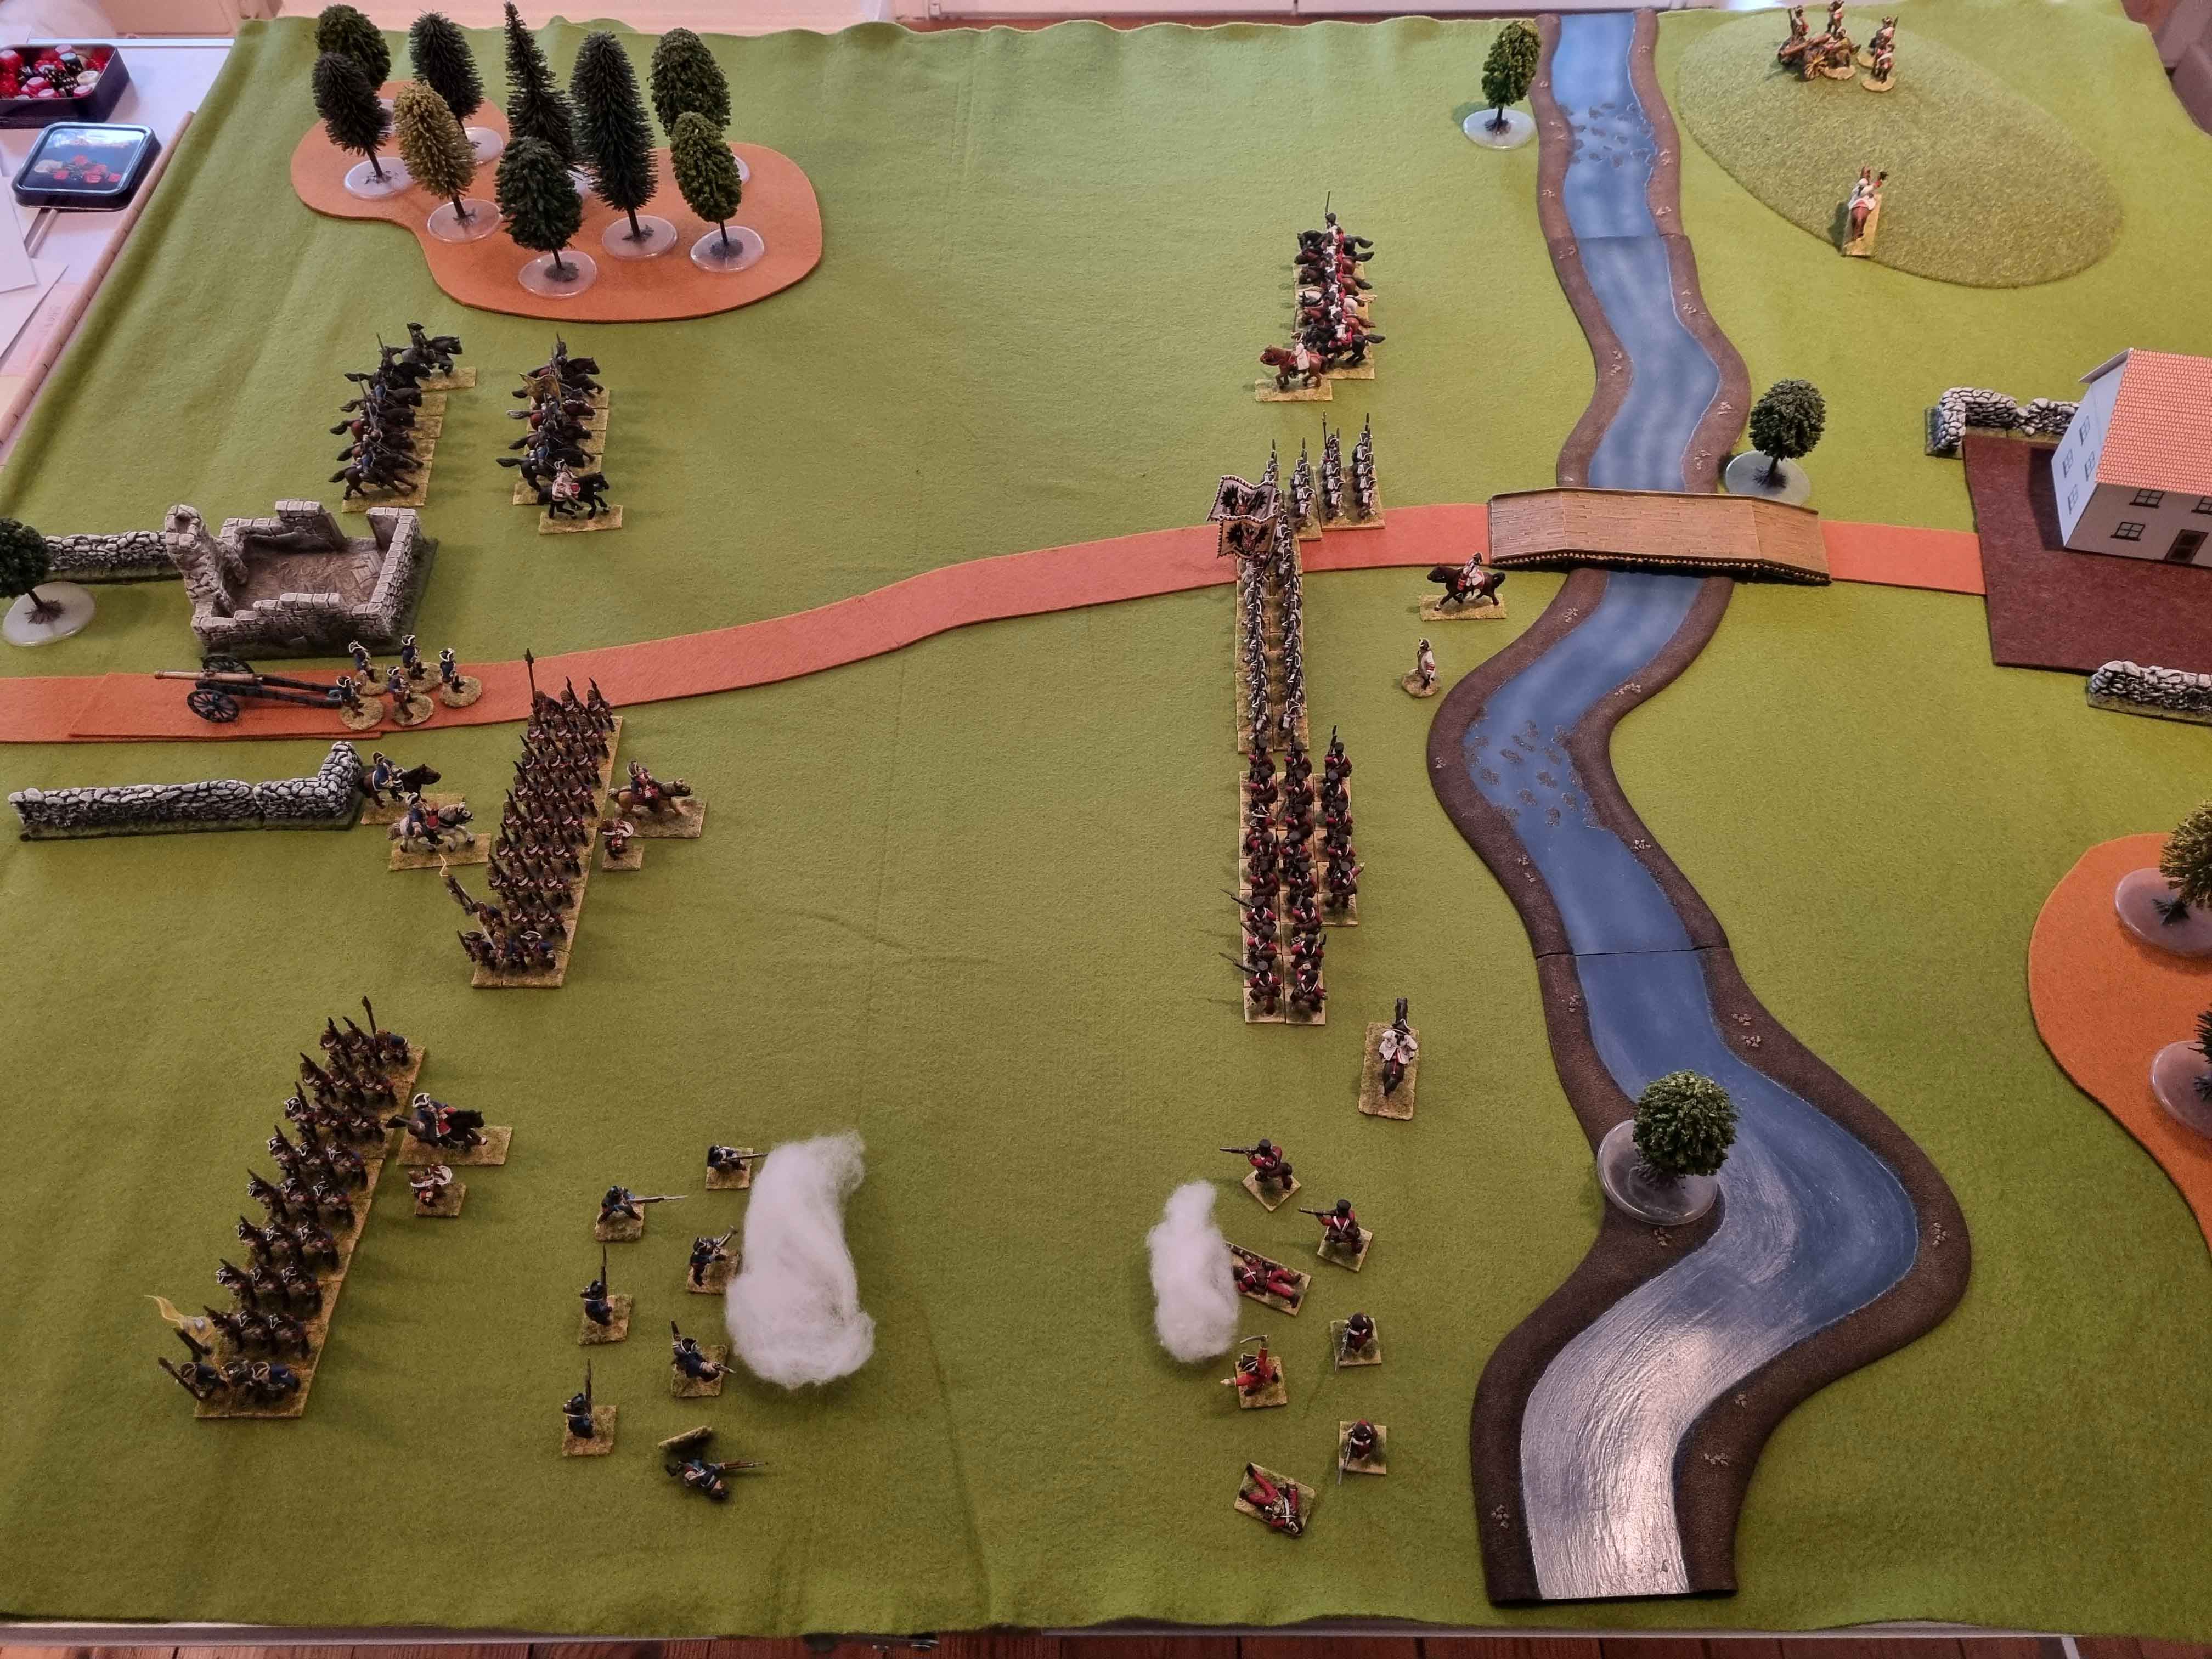
First Volleys are exchanged


Phase 3:  "The Undoing"


Top left: 1st squadron lost the melee and retires, canister
fire at 2nd squadron on the bridge with no effect!


Top center, on the bridge: Desaster and Devastation!
The first volley of the Croats wipes out the 2nd squadron

Also in the above photo at the top:  The victorious cuirassiers rally but come under fire from light infantry (Freischar Dreyer) while these themselves are under canister fire. Both take casualties. The limbered up gun tries to seek shelter with the infantry and hastens forward.

Top left: Desaster again! The cuirassiers charge and
overwelm the gun section. The infatry firefight intensifies.


Top left: The cuirassiers regroup once more. They receive new orders
from their ADC: "Charge the enemy infantry in the rear. Now!"


Unable to respond in time, the enemy infantry regiment is routed.

Also in the above photo at the top right:  The Reichsbund Sacher regiment has routed, too. Though overstrength, it could not withstand the continous musketry fire of two enemy units.

With the bridge still guarded by good-order infantry and a
gun section, the attacker breaks off the action and retreats


Conclusions:

A fantastic game. The light infantry firefight, the high "Price of Overconfidence" due to "That fateful charge" and its bitter consequences. That hero cuirassier squadron. Winning a melee, riding down a gun section and tipping the enemy infantry attack into the abyss.
The rules are fun to play with oders and ADC's moving about. All good stuff.

What is next?

Scouts have reported that Reichsbund reinforcements are on the way to St. Ulrich. A possible Reichsbund counteroffensive?

Wednesday, November 1, 2023

The Action at St. Ulrich - AAR Part 1

Having rebased  three units of infantry and added a few figures, it is time for a game. The scenario is straight out of the Honours of War rulebook named „The Combat of St. Ulrich“ [click pictures to enlarge]:

At-Start Deployment

 St. Ulrich is to the right (east) of the river Blauwasser, the ruins of Muhlhausen to the left (west).

Table Size:  5' x 4'
Figures: 28mm
Rules: The War Game (2012) plus addenda from Refighting History books (Vol. 6 and Vol. 9), at 2/3 movement and ranges
Unit size: 24+5 for infantry, 6+1 for companies and squadrons. Regiment Sacher at 32+5.

Attacker: Duchy of Rodenburg (based on Prussia). CiC: Ferdinand von Sturmschuh
Defender: Reichsbund (based on Austria). CiC: Baron Goldegg

Attacker Mission:  Secure a crossing over the river Blauwasser

The Rodenburg force advances

Attacker's Plan: Infantry forms line to the right and advances. Artillery moves forward, unlimbers and opens fire. Cavalry kept back out of enemy artillery range.

Defender's Plan:  Baron von Goldegg has discussed his options with his staff (my daughter and son) what he should do if his confident „show of force“ with his back to the river should fail to deter an attacker.
His staff, after evaluating alternatives, unanimously advocated the following course of action:

(a)  Immediately withdraw behind the river. The unit next to the bridge (Regiment Sacher, 32+5) first. Cavalry last as it covers the retreat.
(b)  First regiment to cross takes up position south of the bridge (bottom of photo), the other (Plekdy-Gladz Infantry, 18+3, loose order) in front of the village.
(c) Gun section is to reposition IMMEDIATELY next to and to the north side of the bridge. (No one remembered who placed them that far from the action !)

[Game Mechanics:  The order for the infantry to withdraw is considered given at game start, i.e. Move 0. The gun section does require an order to be delivered by the ADC.]

The view from the Reichsbund gun section


Phase 1:  The attacker approach and the Light Infantry firefight

Approach and first blood

The attacker (Rodenberg) is in the process of forming line. The cacavalry is kept out of enemy artillery range. The light infantry (Freischar Dreyer) successfully engages the enemy croats (2 to1 casualties).
The defender is seen starting the withdrawl. The Reichsbund ADC, a certain Graf Kinsky, is seen on his way to the gun section to deliver the new orders to reposition.

Reichsbund Plekzy-Gladz lights („Croats“) retire !

Freischar Dreyer wins the firefight. the Croats retire. The Reichsbund gun section on the hill fired on the two enemy Dragoons squadrons with no effect. The ADC has just arrived there with new orders. The wirhdrawl makes good progress as the attacker gun section is still on the move.

The Rodenburg gun section finally unlimbers.
Freischar Dreyer now engages the withdrawing enemy.


This could hurt …


[Part 2 to follow]

Sunday, May 26, 2019

AWI: Battle of Hubbardton

What prerequisite is there to fully enjoy a historical wargame scenario and its tactical challenge? Answer: You do not know anything about the battle (and even about the war).

With this being the case, my friend „The Don“ invited me to take on the role as the scotsman Simon Fraser, British Commander at the Battle of Hubbardton, July 7th, 1777 (click pictures to enlarge).

Brigadier General Simon Fraser confering with Major Robert Grant (24th Foot),
Major Alexander Lindsay (Lt. Infantry) and an Indian Scout: „Where is Riedesel?“
 
The rules in use were Keith Flint's „Post of Honour“, a simplified version of his „Honours of War“ rules.

The scenario began with some well thought out „Kriegsspiel“-elements, which required me to assess various and conflicting intelligence reports. Not knowing what went on historically added a lot in respect to immersion!
 
The plan I came up with, centered on a controlled and measured offensive on left wing and center combined with a flanking maneuver on the right with the Grenadiers. I wanted to give Baron Riedesel - my reinforcements, whose position I was unsure of - time to arrive and act as a reseve and not exhausting my troops too early.

Starting Positions: looking from west to east, with
Sucker Brook at the bottom, Grenadiers on the right
The Grenadiers make progress through difficult terrain while the
British main battleline, moving slowly forward, encountered
 impediments (not modelled, but asumed)
The Americans move forward. The Britsh fire first,
but gain no advantage from that.


The musketry exchange in the centre heats up. The Grenadiers
break out of the woods and assault the Green Mountain Boys
and Baron Riedesel finally arrives!
Major John Alcands Grenadiers in the thick of the fighting as
American Militia gazes in awe. The Grenadiers will prevail!
The American attack is repelled, the Green Mountain Boys dispersed
and the American Morale beyond breaking point - they rout in numbers!

A Britsh victory thanks to the steadfast Grenadiers and the recklessness of the Americans who repeatedly threw themselves against the "red brick wall" in close assault.

A thrilling and entertaining game, lasting roughly two and a half hours. The "Post of Honour" rules worked smoothly in the background. Their "Featherstonian" element - the player with the iniative having to decide to move first and fire second or the other way round - required some interesting decision making.

Thanks a lot to the Don for a visually appealing, thrilling and intersting scenario. It proves, that with a simple, well thought-out ruleset and the right mindset a lot can be achieved.

Tuesday, October 3, 2017

Moys 1757 - Die Kriegskunst AAR


This is one of the scenarios from the "Die Kriegskunst" ruleset.
Historically, it is notable for two reasons:
- the Austrians took offensive action and suprised the Prussians
- the Prussian commander, the highly regarded Generalleutnant
   von Winterfeldt, was wounded and died a few days after the combat.

The action began and for the most part concentrated on the area around the Jäckelsberg, who contained a prussian artillery redoubt, guarded by Grenadiers. We happily used a mixture of Malburian and SYW miniatures; "Prussians" defend the hill, "Austrians" attack it.
(Click pictures to enlarge)


The Grenadiers were having breakfast when suddenly a number
of Austrian Grenadier battalions in attack column appeared ...

 
The guns opened fire! Austrian reinforcements
can be seen in the background.

Light troops appear from the south - Hussars and Grenzers.

The situation looks desperate. The Lights are halting. The attack
order has not come through. All work is left to the attack columns.

The fighting intensifies. The Prussian Grenadiers
fight bravely but have to retreat.

The Austrians capture the Jäckelsberg.
Prussian reinforcemnts appear.


At this point, turn six of the suggested total of ten, the situation on the table looked very akward to us.

The scenario rules require the Austrian Grenadiers to retreat from the Jäckelsberg immediately after they have captured the hill. With the prussian reinforcements right beside them, with minimal losses to themselves, more fellow Austrians marching directly towards them and their own light troops in the vincinity - would they really retreat ?!

Hisorically, according to the kronoskaf website, they did not retreat. They defended the hill, supported by artillery.

We concluded that the chances for the Prussians to recapture the hill were rather slim if we would simply revoke the scenario special rule and allow the Austrian Grenadiers to stay and defend the hill.
The Austrians were too numerous.

We ended the game and used our time to discuss future plans.

Personal insights gained:

a)  Scenario design is an art.

b)  The scenario special rules in conjunction with what might be called a "Heat of Battle Mental Blackout" caused me to unintentionally adopt non-historical tactics.
Look at the last picture above. Prussian infantry in close proximity to the enemy marching happily along in column formation! Good god! Is it 1792 already? What was I thinking?
(Of course, there was a logical reason for this: the Austrians are no threat anymore. The scenario special rule requires them to retreat. They won't fire and won't use their guns.)

Player logic killed historical logic.

Have you experienced something similar or do you not mind at all and say "Imagination" ?

Monday, September 11, 2017

Charge! + Stuart Asquith modifications + One Hour Wargames = Fun


Time, space and the number of miniatures – three things I struggled with recently.

One solution: Use the classic Charge! rules, add some neat rules modifications Stuart Asquith used in his games with Keith Flint (Old School Napoleonics, The Action At Annie's Farm) on a 6' x 3' foot dining table and combine them with one of the scenarios from Neil Thomas' book „One Hour Wargames“ which uses a 3' x 3' board and six units per side.

The resulting layout for Scenario 4: Take the High Ground, One Hour Wargames, p. 72, (click pictures to enlarge):

Austrians have set up two units on the hill.
Prussians entered along the southern board edge.

Austrians (Defender)
CiC (1 Figure)
4 x Infantry (10 Figures each)
1 x Light Infantry (8 Figures)
1x Artillery (4 Figures)

Prussians (Attacker)
CiC (1 Figure)
3 x Infantry (10 Figures each)
1 x Light Infantry (8 Figures)
1 x Cavalry (5 Figures)
1x Artillery (4 Figures)

Total number of miniatures: 101

The mission for both sides is two be in possession of the hill at games end (after 15 turns).

Austrian reinforcements arrive


First blood – Frei-Infanterie engages from a distance


Close range artillery fire - More casualties for the Austrians


The Prussian cavalry charges ...


and is repulsed !

The Prussian infantry storms the hill – The Light Infantry
of both sides fight it out in the woods


The big melee on the hill – Prussian Frei-Infanterie has been
dispersed and the croats assault the Prussian gun


The Austrians concede and retreat
(in fact, I used the kitchen table and dinner had to be served)

Conclusion: An entertaining little solo game. I was pleased with „the look of the thing“. The Charge! rules with Stuart Asquith' modifications worked well. I still have to take a deeper look at them and create my own play-sheet.

Gaming with small-sized units, i.e. 10 figures for infantry, 5 for cavalry allows for quicker progress along my work-up schedule to larger battles/units. I´m thinking about playing Honours of War scenarios with 10-figure infantry battalions and 4-trooper cavalry now that I´m comfortable with the look.

Monday, August 7, 2017

Die Kriegskunst - Test Game


An invitation to a game from someone who can set up a 10' x 6' table, owns TWO sizable armies for the War of the Spanish Succession and knows the Die Kriegskunst rules? Yes!


 The Smoke of the first shot of the combat disperses and three Riders
of my opponent were unhorsed by that little 4-pdr. firing cannister!
A failed morale test forces the cavalry to retreat ...


My Center and Right Wing. We both had
an additional Brigade on our other wing.


 Looking gooood ....

Cavalry Action on the right wing. Inconclusive!
Note the riderless horses running around


My impressions of the rules and the game:
-  the rules worked well, no disputes. For me the command system had the right "stiffness" (we treated both sides as Prussians for command. They have a big advantage in this regard).
-  both players operated cautiously, had respect for one another, i.e. the other sides firepower (namely the artillery; 8 guns on the table; Cannister hurts)
-  the game felt veeeery  Seven Years War. Beautifull armies, enough troops (albeit the big infantry clash did not happen), adequate terrain, two lines of infantry, no Grand Batteries, good atmosphere.

A big thank you to my fiend tattergreis for this invitation. I look forward to our next game, a deliberate attack/defence action to get to a decent infantry clash ....

Saturday, March 5, 2016

Honours of War - St. Ulrich Solo Game - Part 7

Turn 7 (click pictures to enlarge)

1. Move commanding generals:  Both remain where they are.

Turn 7: Last Prussian Batallion standing ...

The hit status of the troops is as follows:
Prussians:  Dragoons 0, II/IR41 3, Composite Btl. Done For, 12pdr 0.
Austrians:  Cuirassiers 0, I/Kaiser 1, II/Kaiser Done For, Salm-Salm 1, 6pdr 1.

2. Movement Initiative:  Prussians win. Roll of 5 +1 = 6 versus Austrians 4 +1 = 5.

3. Movement:
The Prussians decide to move first. They want to move back the remaining infantry batallion, but they fear there is not much hope for survival.

3.1 Prussian Infantry: Dashing, roll of 4 results in 'Steady'. II/IR41 moves backwards 20cm.

3.2 Austrian Infantry: Dithering upgraded to Dependable due to the CiC nearby, roll of 3 results in 'Steady'. Both batallions advance. The gun manhandles forward.

The Prussians move backwards, the Austrians advance

3.3 Prussian Dragoons. Dependable, a roll of 5 results in 'Steady'.

Now what do do? The II/IR41 infantry is about to be shot to pieces. If they only retreat, the Austrians will capture the bridge and win.
They decide to CHARGE the enemy gun, meaning they will be countercharged by the cuirasiers. They will fight at a disadvantage (the cuirassiers are rated superior), but if they can rout the cuirassiers, it will result in a drawn game, even if they themself are routed.

3.4 Austrian Cuirassiers: Countercharge.  

4. Firing Initiative: Prussian roll of 3 +1 = 4 versus roll of 3. Prussians win.

5 Firing Phase:
5.1 The prussian Brummer, nearest target I/Kaiser. Standard artillery, -1 target classed as superior, roll of 3 -2 = 1 results in NO EFFECT.
Prussian II/IR41, standard, nearest target I/Kaiser,  -1 target classed as superior, -1 moved, - 1 Difficult Target (less than half of the btl. is within the firing zone), -1 long range, -1 unit has 3 hits, roll of 4 -5 = -1 results in NO EFFECT.

5.2 Austrian 6pdr is unable to fire. It is blocked by the cavalry melee !
I/Kaiser at II/IR41, superior, -1 moved, -1 long range, - 1 Difficult Target, roll of 2 -3 = -1 results in NO EFFECT.

Wow. II/IR41 held its ground! The gun was unable to fire (which made all the difference) and I/Kaiser missed.

6. Melee:
1st Round:
Austrian Cuirassier, superior, +1 for charging, roll of 4 +1 = 5 results in THREE HITS.
Prussian Dragoons, standard, +1 for charging, -1 target classed as superior, roll of 4 +1-1 = 4 results in TWO HITS.
2nd Round:
Austrian cuirassier, superior, roll of 5 (maximum damage!) results in THREE HITS.
Prussian Dragoons, standard, -1 target classed as superior, -1 unit has 3 hits, roll of 5 -2= 3 results in TWO HITS.
 
Game Over! The Prussian Dragoons are Done For. The Cuirassiers retreat
 
Army Points lost:  Prussians: 2  Austrians: 1. Austrian Victory


Turn Commentary
A frontal charge against cuirssiers, rated superior, is a BAD idea. Not only are they more difficult to hit (modifier -1 for target being rated superior), the cuirssiers themself also can inflict more damage as they have their own line on the Hit Table.

Thursday, March 3, 2016

Honours of War - St. Ulrich Solo Game - Part 6

Turn 6 (click pictures to enlarge)

1. Move commanding generals:
The prussian commanding general, has no game function stays on the bridge.


The Austrian CiC moves to be able to encourage the cavalry as well as his Dithering brigadier
 
The hit status of the troops is as follows:
Prussians:  Dragoons 0, II/IR41 1, Composite Btl. 2, 12pdr 0.
Austrians:  Cuirassiers 0, I/Kaiser 1, II/Kaiser Done For, Salm-Salm 1, 6pdr 1.

2. Movement Initiative:  Prussians win. Roll of 6 +1 = 7 versus Austrians 3 +1 = 4.

3. Movement:
The Prussians decide to move first. They want to move forward, away from the river. The river is classed as impassable and if a unit cannot complete a forced retreat move due to impassable terrain, it is eliminated.

3.1 Prussian Infantry: Dashing, roll of 1 results in 'Steady'. Both infantry batallions march forward and to the left. The 12pdr pivots a bit to the left and forward (counts as moving).

Both prussian infantry batallions march forward

3.2 Austrian Infantry: Dithering upgraded to Dependable due to the CiC nearby, roll of 4 results in 'Steady'. I/Kaiser remains stationary. Salm-Salm moves the full move forward. The gun manhandles forward.

3.3 Prussian Dragoons. Dependable, a roll of 5 results in 'Steady'. They move to protect the flank of the infantry and change formation to single line.

3.4 Austrian Cuirassiers: Dependable, a roll of 2 results in 'Steady'. They change formation to double line and move forward to protect the gun. 


Situation afer Turn 6 movement
 
4. Firing Initiative: Prussian roll of 4 +1 = 5 versus roll of 3. Prussians win.

5 Firing Phase:
5.2 The prussian Brummer, nearest target I/Kaiser. Standard artillery, - 1 moved (it pivoted) , -1 target classed as superior, roll of 3 -2 = 1 results in NO EFFECT.
Prussian composite bataillon, nearest target I/Kaiser, standard, - 1 moved, -1 target classed as superior, -1 long range, roll of 3 -3 = 0 results in NO EFFECT.
Prussian II/IR41, nearest target I/Kaiser BUT Salm-Salm, not being rated superior, is easier to hit and therefore selected as the target. Standard, - 1 moved, - 1 Difficult Target (less than half of the btl. is within the firing zone), -1 long range, roll of 3 -3 = 0 results in NO EFFECT.

Damn! No hits for the prussians this round. Things may start to fall apart ...

The firefight on Turn 6

5.1 Austrian 6pdr fires cannister at II/IR 41, superior, -1 moved, roll of 2 +2-1 = 3, 1 HIT.
Salm-Salm at II/IR41, Standard, - 1 moved, - 1 Difficult Target (less than half of the btl. is within the  firing zone), -1 long range, roll of 5 (maximum!) -3 = 2 results in 1 HIT (II/IR41 now has received a total of 3 hits).
I/Kaiser at Prussian composite batallion, superior, -1 long range, roll of 5 (maximum again!) -1 = 4, 3 HITS !!  The prussian composite batallion goes from 2 hits +3 to 5 hits, DONE FOR !

Command Casualties: Prussian Brigade Commander, roll of 3, no effect. Reactions to Firing: Prussian composite batallion routs towards the bridge.

The situation at the end of turn 6 - the Prussian composite batallion routs towards the bridge

6. Melee: -
7. Rally:  No rallies (the last remaining hit on a unit may never be rallied off).
8. Army Points lost:  Prussians:  1     Austrians:   1

Turn Commentary
The prussian fire was bad, the austrian fire excellent (they rolled a 5 two times).The prussian composite batallion is DONE FOR and II/IR41 now has received a total of 3 hits. Both austrian infantry units have one hit each.
The situation for the prussians looks desperate ...